Table of Contents
Plastering a wall can transform the look and feel of a room, providing a smooth and professional finish. Whether you’re a seasoned DIY enthusiast or a beginner looking to learn a new skill, understanding the process and tools needed for plastering is essential.
In this comprehensive guide, we’ll delve into the world of plastering, exploring everything from the necessary tools and wall preparation to the step-by-step process of applying plaster. We’ll uncover valuable tips for achieving a professional finish and highlight common mistakes to avoid. By the end of this article, you’ll be equipped with the knowledge to tackle your plastering project with confidence. So, let’s roll up our sleeves and get started with the fundamentals of plastering.
What Is Plastering?
Plastering is a technique used in construction and DIY projects to create a smooth and durable finish on walls and ceilings. It serves as a fundamental step in achieving aesthetically pleasing and long-lasting wall surfaces. Different materials such as gypsum, lime, and cement are used in plastering to cater to specific requirements. The application of plaster involves applying multiple layers, smoothing, and finishing techniques to ensure a professional outcome. Plastering plays a crucial role in enhancing the structural integrity of walls, providing insulation, and covering imperfections for an overall polished look.
What Tools Are Needed For Plastering?
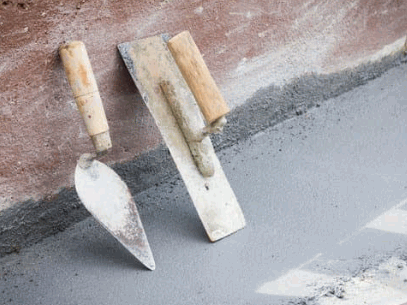
Plastering requires a specific set of tools including a trowel, float, and other essential equipment to apply and smooth out the plaster on the wall surface.
These tools play crucial roles in the application and finishing of plaster. The trowel, for instance, is essential for spreading, shaping, and smoothing the plaster, while the float is used for achieving a professional, smooth finish. Other essential tools such as the hawk, mixing paddle, and plasterer’s featheredge are also necessary for ensuring an even and uniform application of plaster.
Using the right tools is imperative for achieving a high-quality plastering job, as they contribute to the overall finish and durability of the surface.

How To Prepare The Wall For Plastering?
Before plastering, it is crucial to prepare the wall surface by cleaning, repairing any damages, and applying a primer to ensure a smooth and even finish.
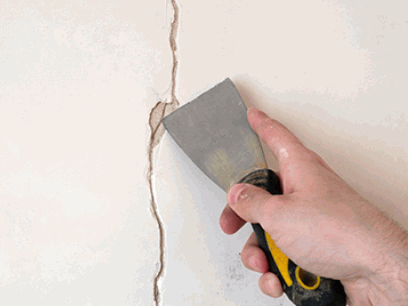
This step-by-step process is essential in achieving a flawless plastering finish. Begin by cleaning the wall surface to remove any dirt, dust, or debris that could affect the adhesion of the plaster. Next, carefully inspect the wall for any cracks, holes, or imperfections and address them by filling it with spackling or joint compound and smoothing it out.
Once the repairs have dried, apply a high-quality primer to create a uniform surface and enhance the bond between the plaster and the wall. Proper wall preparation plays a significant role in home improvement and renovation projects, ensuring a professional and durable result.
Clean The Wall
Cleaning the wall surface is the first step in preparing for plastering, ensuring that the area is free from dust, debris, and any contaminants that can affect the plaster application. This essential process involves inspecting the wall for any grease, mold, or loose paint and then removing them thoroughly. Techniques such as scrubbing with a mild detergent solution or using a mixture of water and vinegar can effectively eliminate dirt and grime. Sanding the surface can smooth out imperfections and create a clean canvas for the plaster.
The impact of a clean surface cannot be overstated, as it directly influences the adhesion and longevity of the plaster finish. A well-prepared wall sets the stage for a flawless and durable renovation, ensuring that the plaster adheres properly and achieves a smooth, professional result.

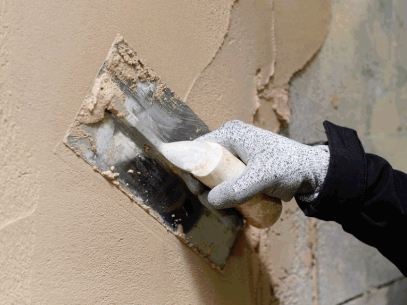
Repair Any Damages
Repairing any damages on the wall, such as cracks or holes, is essential to ensure a seamless and uniform plaster finish without imperfections.
Identifying the type and extent of damage is crucial before initiating repairs. Small holes and cracks can be filled with spackling compounds, while larger holes may require a patching material like a joint compound or plaster.
Proper surface preparation, including cleaning and smoothing the damaged area, is key to achieving a durable repair. Using a primer or sealer after repairing the damages can enhance adhesion and promote a uniform finish when applying plaster.
Apply A Primer
Applying a primer to the wall surface facilitates better adhesion for the plaster, promotes an even finish, and prepares the surface for paint or additional treatments.
It acts as a bonding agent between the wall and the plaster, ensuring that the plaster adheres effectively. The primer helps to seal and smoothen any imperfections on the surface, creating a uniform base for the plaster application. This not only enhances the aesthetic appeal but also prevents the plaster from peeling or cracking over time.
The use of a primer improves the longevity of the paint or any subsequent surface treatments, contributing to a durable and high-quality finish.
What Are The Steps To Plaster A Wall?
Plastering a wall involves a series of steps including:
- Mixing the plaster
- Applying the first coat
- Smoothing the surface
- Applying subsequent coats to achieve a seamless finish
Once the plaster mixture is prepared to the desired consistency, start by applying the first coat evenly across the wall using a hawk and trowel or a plastering float. After the initial coat, ensure the surface is leveled and smoothed using a straight edge or plasterer’s rule.
Subsequently, apply additional coats as needed, allowing each layer to dry before applying the next. A thorough understanding and execution of these steps are crucial for a professional and flawless plaster finish.
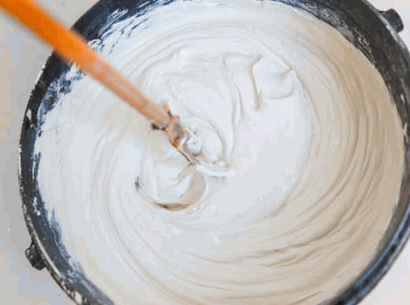
Mix The Plaster
Mixing the plaster to the right consistency is crucial for ensuring proper adhesion and workability during the application process, leading to a desirable finish.
The process of mixing plaster begins with gathering the essential materials, including clean water, a mixing container, and plaster powder. It’s important to measure the water and plaster accurately to maintain the correct ratio. Gradually add the plaster to the water, allowing it to absorb without forming lumps. Use a stirring tool to mix the components thoroughly, ensuring a smooth and homogenous texture. Achieving the right consistency is vital for a successful plaster application, as it impacts the material’s spreadability, adherence, and overall final appearance.
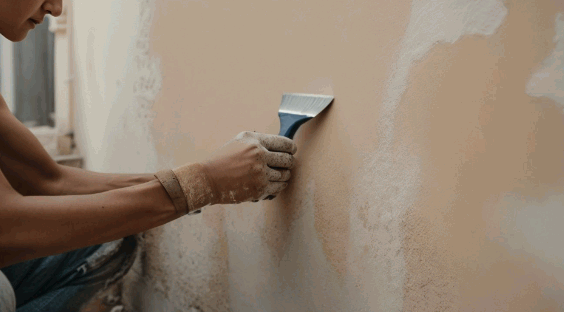
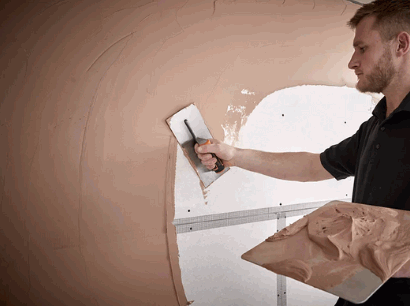
Apply The First Coat
Applying the first coat of plaster involves the initial layering and application, setting the foundation for subsequent smoothing and finishing processes.
This crucial step requires attention to detail to achieve an even and consistent application. One technique often used is to apply the plaster in thin, overlapping layers, smoothing it with a trowel as you go.
It’s essential to ensure that the entire surface is covered to create a sturdy base for the subsequent coats. The first coat’s proper application impacts the overall quality and durability of the plaster, making it vital to get this step right.
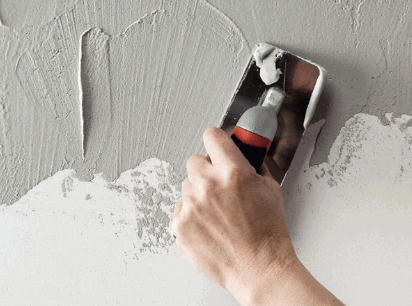
Smooth Out The Surface
Smoothing out the plaster surface is a critical step that involves techniques such as troweling and floating to achieve an even and uniform finish.
This process requires careful attention to detail to ensure that the plaster is free from imperfections, such as air bubbles and uneven patches. To achieve a seamless finish, skilled plasterers often use a combination of a steel trowel and a plastic float to level the surface and achieve a consistent texture. The careful manipulation of these tools allows for the creation of a smooth and visually appealing plaster surface that enhances the overall quality of the finished wall or ceiling.
Apply The Second Coat
Applying the second coat of plaster builds upon the initial layer, allowing for additional refinement and enhancement of the surface finish.
This step is crucial in achieving a professional and durable plaster finish, as it smoothens out any imperfections and irregularities left after the first coat. The second coat also provides an opportunity to address any areas that may need additional thickness or leveling, resulting in a more uniform and visually appealing wall surface. By carefully applying the second coat, the overall appearance of the wall can be significantly improved, creating a sleek and seamless finish that is both aesthetically pleasing and long-lasting.
Smooth Out The Surface Again
After applying the second coat, smoothing out the surface again ensures a consistent and flawless finish, enhancing the overall appearance and durability of the plastered wall.
This additional surface smoothing is crucial as it helps to eliminate any imperfections or irregularities that may have occurred during the application process. Carefully smoothing the surface, allows for better adhesion of subsequent layers of paint or finishes, ultimately contributing to a more professional and refined look.
Techniques such as sanding, troweling, or even using a damp sponge can be employed to achieve this final smooth finish. These methods play a significant role in achieving a flawlessly smooth surface, improving the overall aesthetic, and increasing the longevity of the plastered wall.
What Are Some Tips For A Professional Finish?
Achieving a professional finish in plastering requires the use of specific techniques, tools, and materials, along with attention to detail and precision throughout the application process.
One crucial technique is to ensure that the surface to be plastered is clean, dry, and free from any debris. This provides a smooth and stable base for the plaster to adhere to. Using the right tools, such as trowels and floats, is essential for achieving a uniform and smooth finish.
When selecting materials, opt for high-quality plaster that suits the specific requirements of the project. Taking your time to apply the plaster methodically and evenly across the surface will contribute to a flawless, professional finish.
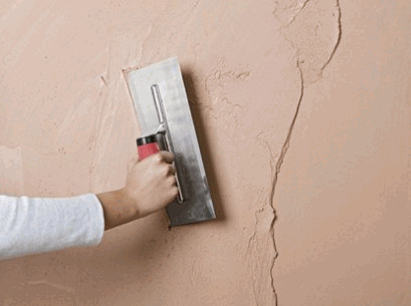
Use A Plastering Hawk And Trowel
Utilizing a plastering hawk and trowel enables precise application and smoothing, facilitating the achievement of a professional and seamless plaster finish.
These essential tools offer control and balance, allowing the plaster to be applied evenly and smoothly without any uneven surfaces. The hawk provides a stable platform for holding the plaster, while the trowel facilitates precise movements for spreading and leveling the material. The combination of these tools ensures that the plaster is applied with uniform thickness and texture, resulting in a flawless finish. Professional plasterers value the accuracy and efficiency that the hawk and trowel provide, allowing them to create smooth and visually appealing surfaces with ease.
Keep The Plaster Consistent
Maintaining consistent plaster application and smoothing techniques throughout the process is crucial for achieving a professional and uniform finish.
This level of consistency ensures that the surface remains smooth and free of imperfections, enhancing the overall aesthetic appeal. It also plays a vital role in preventing costly rework and repairs, as a consistently applied plaster layer reduces the likelihood of uneven drying and cracking.
To maintain this consistency, practitioners should pay close attention to the mixing and spreading of the plaster, continuously monitoring the thickness and texture to ensure an even application. Employing precise tools and techniques, such as trowels and floats, also contributes significantly to achieving a high-quality outcome.
Smooth Out Any Imperfections
Identifying and smoothing out any imperfections in the plastered surface is essential for achieving a professional and flawless finish.
This process begins with a thorough inspection of the plastered surface, where any unevenness, bumps, or blemishes are carefully scrutinized. Once the imperfections are identified, addressing them with precision is vital. Techniques such as feathering, sanding, and filling are commonly used to refine the surface. Employing specialized tools like sanding blocks, trowels, and joint knives plays a crucial role in attaining a smooth and seamless finish. By meticulously addressing imperfections, the overall quality and durability of the plastered wall are significantly enhanced.
Sand Down The Surface
Sanding down the plastered surface smoothens out any rough areas and imperfections, contributing to a professional and refined finish.
This crucial step not only creates a smooth and level surface but also enhances the overall appearance of the wall. It involves using fine-grit sandpaper to gently remove any unevenness, creating a uniform texture. The specific sanding techniques include circular or back-and-forth motions, carefully addressing any irregularities. Specialized sanding tools such as sanding blocks or orbital sanders are employed to achieve consistent results. The meticulous approach to sanding ensures that the plastered surface is flawlessly prepared for painting or finishing, ultimately elevating the quality and aesthetics of the wall.
How To Clean Up After Plastering?
After plastering, it is essential to clean up the work area by removing any excess plaster, dust, and debris, ensuring a tidy and organized space.
This involves scraping off any dried or excess plaster using a putty knife or scraper, followed by vacuuming or sweeping to remove all dust and debris. It’s important to also organize and put away all the tools and materials used during the plastering process to maintain a clutter-free environment. By ensuring a clean workspace, you create a safer and more efficient working environment, while also contributing to the overall quality and professionalism of the project.
Take a look: How To Repair Peeling Paint On Plaster Walls
What Are Some Common Mistakes To Avoid While Plastering?
Common mistakes to avoid in plastering include:
- Uneven application may lead to visible patches and an unprofessional appearance on the wall surface, highlighting the significance of maintaining a consistent thickness throughout.
- Inadequate smoothing can result in rough and uneven surfaces, making it essential to use proper tools and techniques for a flawless finish.
- Improper material consistency, such as incorrect mixing ratios, can lead to cracking and crumbling, emphasizing the need for following manufacturer specifications.
Addressing these mistakes with proper application techniques and material preparation is crucial to achieving a high-quality, professional result in plastering.