Table of Contents
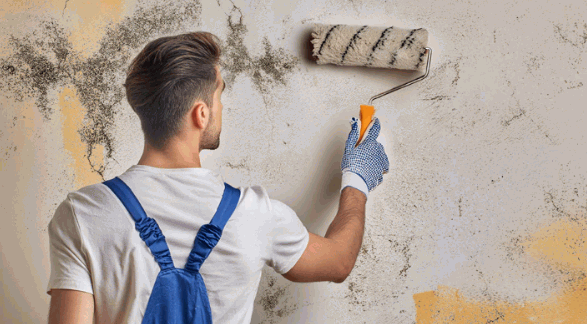
Mould on ceilings is not merely an aesthetic issue; it can present significant health risks and compromise the structural integrity of a home. This article examines the causes of mould growth and emphasizes the importance of treating mould effectively and its removal prior to painting. Readers will gain insight into how to identify mould, assemble the necessary tools for effective removal, and follow step-by-step instructions to address the issue safely. Furthermore, the article will provide preventive measures to avoid the recurrence of mould and offer guidance on when to seek professional assistance. Continue reading to protect your environment and ensure the success of your painting project.
What Causes Mould On Ceilings?
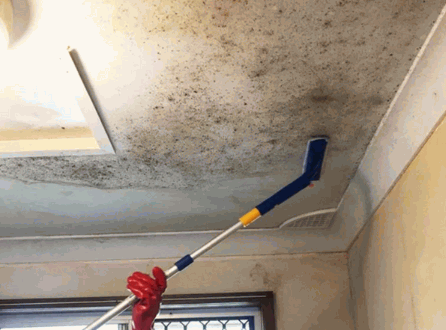
Mould on ceilings is typically a result of excessive moisture, which may originate from various sources such as condensation, leaks, and inadequate ventilation. Factors such as elevated humidity levels, insufficient home ventilation, and moisture-related issues can significantly contribute to the proliferation of mould spores, resulting in unsightly stains and potential health risks.
Experts highlight the importance of understanding the underlying causes of mould growth in order to develop effective removal and treatment strategies.
Why Is It Important To Remove Mould Before Painting?
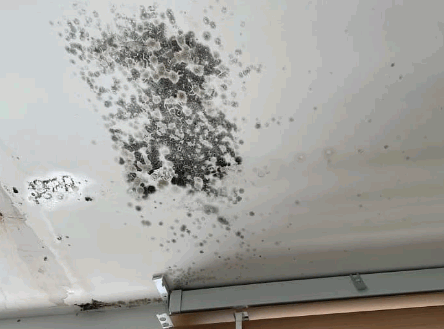
Removing mould prior to painting is crucial to prevent mould damage from undermining both the aesthetic and structural integrity of a home. Mould can induce toxic and allergic reactions, resulting in respiratory issues for the inhabitants.
By ensuring that surfaces are thoroughly cleaned and free of mould, homeowners can safely apply mould-resistant and anti-mould paint, such as those offered by Dulux and Zinsser, thereby contributing to a more durable and healthier living environment.
What Are The Risks Of Painting Over Mould?
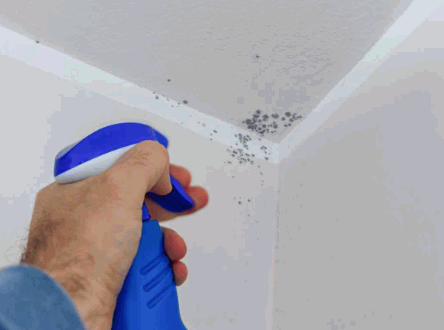
Painting over mould presents significant risks, as it can trap mould spores beneath the surface, allowing them to continue growing and potentially releasing harmful toxins into the air, leading to respiratory problems and toxic reactions. This can lead to various health issues, including allergic reactions and respiratory problems, particularly among sensitive individuals who may be exposed to mould spores without proper precautions.
Before starting any painting project, it is essential to effectively address the mould issue.
- Ignoring the problem and simply applying paint, even specialised products like anti-condensation paint, may offer a temporary aesthetic solution, but it fails to resolve the underlying contamination, which can pose serious health risks.
- An effective mould remediation strategy should incorporate thorough cleaning, removal of contaminated materials, and proper drying techniques to ensure a safe environment.
Individuals should prioritise safe practices when handling mould spores by wearing protective gear, utilising air filtration systems, and employing safe cleaning products such as HG mould spray and H&G mould remover. By adhering to these guidelines, the likelihood of toxic reactions can be significantly reduced, resulting in a healthier living space prior to any repainting efforts.
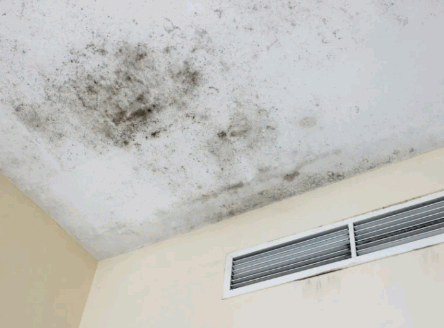
How To Identify Mould On Ceilings?
Identifying mould on ceilings is essential for preventing significant damage and mitigating health risks associated with mould growth and damp problems. Mould may manifest as black, green, or white patches on the ceiling, frequently accompanied by a musty smell.
It flourishes in damp environments, underscoring the importance of moisture control and regular inspections of areas susceptible to moisture problems. These proactive measures are crucial for early detection and the implementation of effective cleaning solutions.
What Tools And Materials Are Needed To Remove Mould?
To effectively remove mould from ceilings, it is imperative to utilise appropriate tools and materials, including cleaning supplies and moisture prevention techniques. A range of effective cleaning products, including household bleach, mildew cleaner, and HG mould spray, is essential for combating mould effectively.
Furthermore, the use of protective gear such as gloves and masks, in conjunction with suitable scrubbing tools, will ensure that the mould removal process is both safe and thorough.
Take a look: Can You Remove Mould From Wallpaper
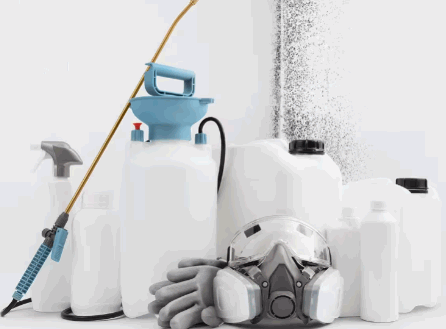
What Are The Recommended Safety Precautions?
In the process of mould removal, it is imperative to implement recommended safety precautions to prevent toxic reactions and respiratory issues linked to mould spores. The use of protective gear, such as gloves, masks, and goggles, is essential to mitigate harmful exposure, especially when utilising potent cleaning agents like household bleach or strong mould removal solutions.
Furthermore, ensuring proper ventilation in the area where mould removal is taking place is critical. This may involve opening windows and doors to promote air circulation, as well as employing fans to disperse any airborne spores. The integration of HEPA filters in air purifiers significantly contributes to minimising exposure to potentially harmful particles.
Individuals should consider the following safety measures:
- Seal off the contaminated area to prevent the spread of spores to unaffected spaces.
- Use a damp cloth during clean-up to minimise dust and prevent particles from becoming airborne.
- Ensure that children and pets are kept away from the work area until it is deemed safe.
- Monitor air quality during and after the cleaning process.
By adhering to these guidelines, and considering advice from a ventilation expert, individuals can not only ensure their safety but also effectively manage the mould issue without exacerbating the health risks associated with exposure.
What Are The Steps To Remove Mould From Ceiling?
The process of removing mould from a ceiling comprises several critical steps to ensure thorough cleaning and effective treatment. Initially, it is important to prepare the area by removing furniture and covering surrounding surfaces to prevent contamination.
Subsequently, a suitable cleaning solution specific to mould removal should be prepared, which may include a mixture of vinegar and bicarbonate of soda or commercially available products such as HG mould spray.
The next step involves applying the solution, scrubbing the affected area thoroughly, and concluding with rinsing and drying to inhibit any potential future mould growth.
Step 1: Prepare The Area
Preparing the area for mould removal is a critical first step that ensures an effective and safe cleaning process.
By meticulously organising the workspace, individuals can significantly reduce the likelihood of mould spores spreading to uncontaminated areas. To initiate this process, it is essential to prioritise the organisation of cleaning supplies. Gather necessary items, such as gloves, masks, and scrubbing brushes, and ensure they are easily accessible to enhance efficiency.
Moisture control is imperative; therefore, it is advisable to employ dehumidifiers or fans to maintain a dry environment prior to commencing the removal process. Ensuring adequate ventilation will facilitate the rapid evaporation of any remaining moisture. It is also recommended to create a checklist to confirm that all necessary precautions are observed, including:
- Removing all fabrics and unnecessary clutter.
- Inspecting for any leaks or sources of excess moisture.
- Wearing appropriate protective gear throughout the process.
By addressing these aspects in advance, the mould remediation process becomes significantly more efficient and effective.
Step 2: Mix The Cleaning Solution
Mixing the cleaning solution is a crucial step in mould removal, as the appropriate blend can effectively eliminate mould spores and clean the affected ceiling. Common do-it-yourself solutions include a mixture of vinegar and bicarbonate of soda, or commercially available products such as HG mould spray, which are specifically formulated for mould treatment.
When evaluating the various options for cleaning solutions, one can recognise the effectiveness of commercial products that provide targeted mould removal capabilities. DIY enthusiasts may opt to create a solution using one cup of white vinegar mixed with one cup of water as a natural cleaning alternative, or they may prefer a potent bicarbonate of soda paste composed of one-quarter cup of water and one-half cup of bicarbonate of soda. Conversely, multipurpose mould cleaners available on the market often deliver quicker results, owing to their active chemical ingredients.
To ensure both safety and effectiveness, it is essential to wear gloves and a mask when handling strong chemicals, and to maintain proper ventilation. The following instructions outline the process for mixing the chosen solution:
- For vinegar solution: Combine equal parts vinegar and water in a spray bottle.
- For bicarbonate of soda paste: Mix bicarbonate of soda with a small amount of water until a paste is formed.
- For commercial products: Adhere to the manufacturer’s instructions regarding dilution and application.
Ultimately, whether one chooses DIY remedies or ready-made solutions, a meticulous approach focusing on moisture control and effective cleaning can lead to successful mould removal.

Step 3: Apply The Cleaning Solution
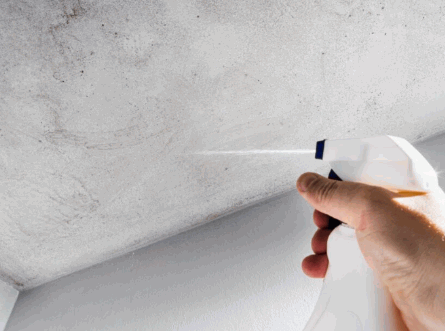
Once the cleaning solution is properly mixed, it is essential to apply it to the affected areas to achieve effective mould removal. Utilising a spray bottle or sponge will facilitate the even distribution of the solution on the mould-infested ceiling, ensuring that all areas are adequately saturated for optimal cleaning.
When applying the cleaning solution, it is imperative to proceed methodically, covering the entire surface without omitting any dry spots. This approach maximises contact between the mould spores and the solution, thereby enhancing the removal process.
Depending on the severity of the mould growth, it is advisable to strictly follow the instructions provided on commercial products. Each product may have specific procedures, which often include a recommended dwell time—typically ranging from 10 to 30 minutes—prior to wiping or rinsing. This dwell time allows the active ingredients in the solution to penetrate and effectively break down the mould.
- Use a spray bottle for larger areas to ensure an even application.
- A sponge may be more effective for precise and detailed sections.
- Always read the label for safety instructions and proper usage.
Step 4: Scrub The Mould
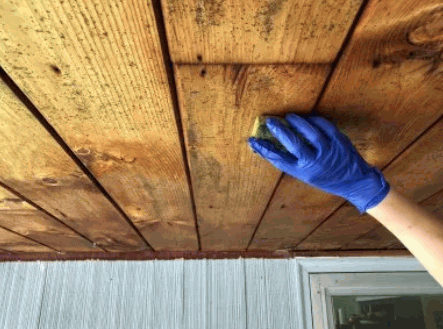
Scrubbing the mould after the application of the cleaning solution is crucial for effective mould treatment. This step facilitates the physical removal of mould spores from the ceiling surface while ensuring that the environment remains safe and healthy. Mould remediation necessitates careful attention to detail to achieve optimal results.
To enhance the effectiveness of this process, the following recommendations should be considered:
- Equipment: A stiff-bristled brush or fine sponge is recommended for addressing mould, provided it is not overly abrasive to avoid damaging the ceiling material.
- Pressure: Apply moderate pressure while scrubbing; excessive scrubbing can compromise the integrity of the ceiling surface, resulting in more harm than benefit.
- Cleaning Solution: Select a solution specifically formulated for mould removal to increase efficacy.
Regular maintenance is essential; by cleaning periodically, one can prevent further mould growth. Establishing a consistent cleaning schedule aids in the early detection of potential issues, ultimately saving time and effort in the long run.
Step 5: Rinse And Dry The Area
After completing the scrubbing process, rinsing and drying the area is essential for effective mould removal. This final step is crucial in preventing any remaining mould spores from re-establishing themselves. It is recommended to use clean water to thoroughly rinse the area, followed by drying with towels or ensuring proper ventilation to achieve a moisture-free surface.
To effectively combat mould, it is vital for individuals to adopt a systematic approach following the initial cleaning process:
- Begin by ensuring that all cleaning residues are rinsed away, as this prevents any substances that could promote mould growth from lingering.
- Consider utilising fans or dehumidifiers to enhance air circulation, which plays a significant role in reducing humidity levels.
- Keeping windows open as much as possible encourages fresh airflow, further aiding in moisture control.
Inadequate drying can lead to the recurrence of mould, making it imperative to implement these ventilation techniques immediately after cleaning.
By prioritising these steps, individuals not only remove visible mould but also fortify the area against future infestations, thereby ensuring a healthier living environment.
How To Prevent Mould From Growing Back?
Preventing the recurrence of mould is essential following successful removal, as it contributes to a healthier environment and preserves the integrity of the home.
Key strategies for achieving this include:
- Implementing moisture prevention techniques
- Enhancing home ventilation
- Utilising mould-resistant paints and materials to counteract conditions that promote mould growth
Tip 1: Control Humidity Levels
Controlling humidity levels is one of the most effective strategies for preventing mould, as elevated humidity creates an ideal environment for mould spores to thrive. It is advisable to use dehumidifiers and ensure that areas prone to moisture, such as bathrooms, are well-ventilated and maintained at an optimal humidity level.
Employing a variety of tools and techniques can significantly enhance the management of moisture within the home. Regularly scheduled maintenance is crucial; by assessing existing ventilation systems, it becomes possible to identify problem areas where moisture tends to accumulate. Ventilation experts can provide invaluable insights and recommendations for improving airflow, which effectively reduces humidity.
To further mitigate moisture-related issues, consider the following actions:
- Install extractor fans in moisture-prone areas.
- Use hygrometers to monitor indoor humidity levels.
- Keep windows open when weather permits to promote natural air circulation.
By implementing these strategies, homeowners can create a more balanced and healthier indoor environment.
Tip 2: Improve Ventilation
Improving ventilation in the home is a critical measure in preventing mould growth, as proper air circulation reduces moisture accumulation in areas where mould typically develops. Effective airflow is essential for maintaining a healthy indoor environment; therefore, it is important to explore various methods for enhancing this aspect of your residence.
Incorporating a combination of natural and mechanical options can significantly improve indoor air quality. Below are several methods to achieve better ventilation:
- Natural Ventilation: Open windows and doors to create cross ventilation, allowing fresh air to enter while stale air exits.
- Vents: Install wall or ceiling vents to balance airflow, particularly in areas that may require additional assistance.
- Extractor Fans: Utilise extractor fans in bathrooms and kitchens to remove excess moisture and enhance air exchange.
- Air Purifiers: Consider employing air purifiers equipped with HEPA filters, which can assist in removing pollutants while circulating air.
Implementing these techniques not only reduces humidity but also minimises the potential for mould growth, thereby fostering a healthier and more comfortable home environment.
Tip 3: Fix Any Leaks Or Water Damage
Addressing any leaks or water damage promptly is essential for preventing mould growth, as moisture intrusion creates an ideal environment for mould spores to proliferate.
Regular evaluations of plumbing systems, roofs, and ceilings are critical for effectively managing potential risks associated with leaks. To ensure that properties remain safe and habitable, it is advisable for individuals to routinely inspect for visible signs of moisture, including water stains, peeling paint, or a musty odour, as these may indicate underlying issues.
When conducting inspections, it is important to be vigilant for the following indicators:
- Condensation on windows
- Rotting wood
- Mould growth in corners or behind appliances
Upon detection of leaks, timely intervention should encompass prompt repairs and the implementation of appropriate drying techniques to effectively eliminate sources of moisture. Adopting these measures is vital to preventing larger-scale mould problems from developing, as proactive maintenance can result in significant time and cost savings over time.
Can Professionals Help With Mould Removal?
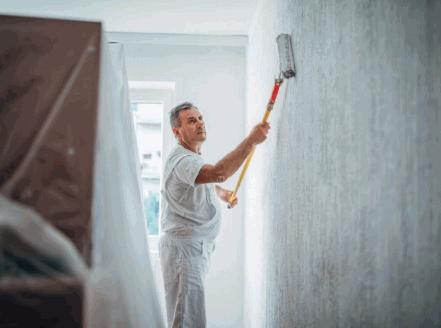
Engaging professionals for mould removal is a prudent option for homeowners confronting significant mould issues, as these experts possess the requisite expertise and specialised products essential for effective mould remediation. Professionals employ advanced mould remediation solutions and techniques that guarantee thorough cleaning and long-term prevention of mould re-growth, tailored to the unique needs of each residence.
Along with their extensive knowledge, these specialists have access to a range of specialised tools that can address mould infestations more effectively than conventional methods.
When contemplating professional assistance, homeowners should consider the following aspects:
- The extent of visible mould, which may indicate an underlying issue within the structure.
- Signs of mould-related health problems among family members that could exacerbate if left untreated.
- A persistent musty odour that lingers despite cleaning efforts.
By seeking professional help, homeowners can anticipate a comprehensive assessment of the mould situation, a detailed plan outlining the necessary steps for removal, and post-remediation guidance to prevent future occurrences. This thorough approach not only resolves existing issues but also provides homeowners with reassurance regarding the safety and health of their living environment.
