Table of Contents
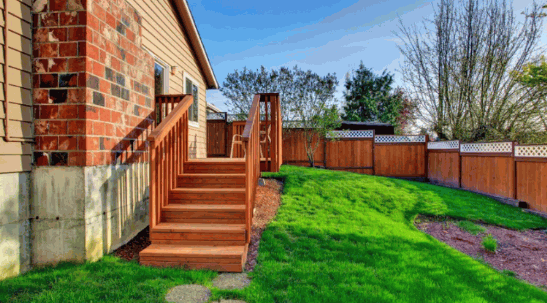
Installing a wood fence on a slope can seem daunting, but with the right tools and materials, it’s a manageable project that enhances your yard’s beauty and privacy.
This guide covers everything you need, from assessing your yard’s incline to the final touches. You’ll find step-by-step instructions, handy tips, and creative solutions for uneven terrain, ensuring a sturdy and stylish fence that complements your landscape.
Ready to transform your outdoor space?
Explore: Can You Paint Composite Fencing
What Tools And Materials Do You Need?
When embarking on the construction of a fence for your sloped property, having the right tools and materials is essential to overcome installation challenges and ensure an attractive, secure layout.
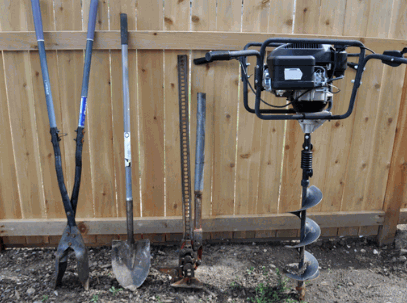
Essential tools include:
- Post-hole digger for digging holes,
- Power drill for securing screws into the fence panels,
- Circular saw for precise cuts.
Additionally, selecting materials such as concrete, gravel, and retaining wall blocks ensures stability and durability against the elements, while also accommodating pets and children who will enjoy the garden.
Tools:
The right tools are crucial for effectively installing a fence on a sloping garden, ensuring that the process is smooth and efficient, as each tool plays a significant role in addressing the unique challenges presented by uneven ground and varying heights.
In the fencing installation process, several tools become essential for overcoming the obstacles of a sloping landscape. A vital component is the post-hole digger, which enables the installation of fence posts at the required depth even on a gradient, ensuring stability. The power drill is equally important, as it securely fastens screws into the posts, preventing wobbling or movement, which is essential for maintaining a level structure on inclines.
The circular saw is essential for cutting materials such as wood or vinyl to the exact lengths needed for sloping sections. This precision ensures that panels fit perfectly, creating a seamless fence line.
- Post-hole digger: Prepares holes for fence posts.
- Power drill: Secures screws and stabilises the fence structure.
- Circular saw: Cuts materials to required lengths for a proper fit.
Using these tools in tandem not only streamlines the installation process but also significantly enhances the durability and overall aesthetics of the fence in challenging terrain.
Materials:
Choosing the right materials is vital for constructing a durable and attractive fence around your property, especially on a slope, as it impacts both stability and aesthetics. When you’re considering the various options available, it’s crucial to recognise how each element contributes not only to the longevity of the structure but also to the safety and functionality suited for families with children and pets. A well-chosen fencing solution enhances the overall landscape, harmonising with the environment while providing necessary security.
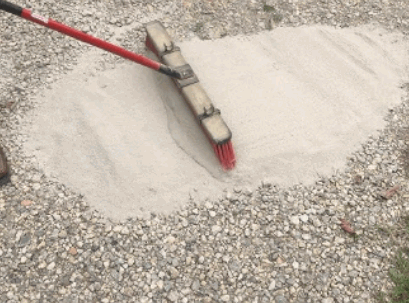
Among the most fitting materials for fencing installations, concrete stands out as an essential choice for post-installation. Its robust nature ensures stability, particularly vital for sloped terrains. Utilising gravel underneath aids in effective drainage, preventing water accumulation that can damage the structure over time.
The inclusion of materials such as English ivy not only adds a touch of elegance and natural beauty but also serves practical purposes. This climbing plant can mask the fence while ensuring the boundary remains secure for pets and children, enhancing the overall aesthetic appeal.
- Concrete: Provides foundational strength.
- Gravel: Enhances drainage post-installation.
- English Ivy: Adds beauty and serves functional purposes.
Selecting the right combination of materials creates a fence that meets the diverse needs of pets, children, and landscaping while offering enduring performance.
Step-by-Step Guide To Installing A Wood Fence On A Slope
Installing a wooden fence on a sloped garden requires careful planning and execution to ensure an attractive and functional barrier that provides security for pets and children. This step-by-step guide will walk you through the necessary stages of selecting the right materials, assessing the terrain, and implementing effective installation techniques to accommodate the varying heights and slopes of your property.
Proper execution will enhance the layout and privacy of your garden while adhering to local planning regulations.
Determine The Slope Of Your Yard
Understanding the slope of your garden is crucial in the planning stages of installing a wooden fence, as it affects the overall height and alignment of the fence panels.
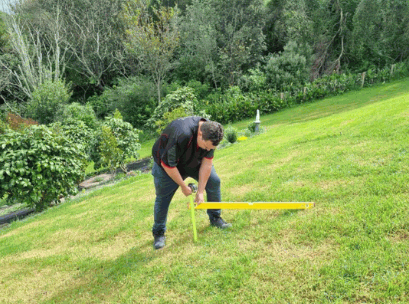
Measuring the slope accurately involves utilising several key tools and techniques that can help in determining the degree of incline present in your space. Correct measurements not only ensure aesthetics but also contribute to the structural integrity and security of your fence.
- Tools Needed: A spirit level, a measuring tape, and stakes or flags are essential for marking reference points.
- Techniques: Start by finding the highest point in your garden and use the spirit level to determine how far down you need to go over a distance of at least 10 feet.
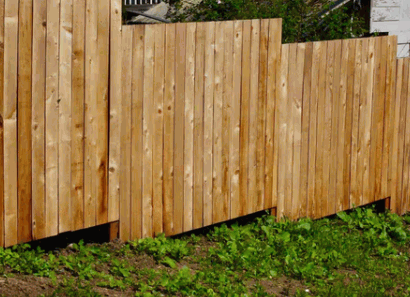
Once the slope is measured, adjustments to the fence installation may be necessary. For instance, when a steep slope is present, it could require a step-down or a tiered design, ensuring that the panels remain parallel to the ground and that visibility isn’t compromised, enhancing both aesthetics and safety.
Plan Your Fence Layout
A well-thought-out fence layout is vital to ensure that the fence meets your needs for privacy, security, and aesthetic appeal while accommodating the sloped nature of your property.
Along with these essential aspects, it is crucial to consider factors such as drainage gaps to prevent water build-up, visibility for both safety and aesthetics, and sufficient access points for children and pets to roam freely. A practical approach includes:
- Evaluating the property boundaries to guarantee compliant positioning
- Incorporating local planning regulations to avoid future legal issues
- Understanding homeowners’ association requirements to maintain neighbourhood standards
By carefully balancing these elements, homeowners can create an effective design that aligns with their desires while respecting community regulations, ultimately resulting in a fence that not only stands out but also enhances the overall value of the property. Planning a fence with drainage gaps, visibility, and accessibility in mind will yield the most satisfying and functional outcome.
Mark The Placement Of Your Fence Posts
Marking the placement of your fence posts is a critical step in the installation process, as it determines the alignment and stability of the entire structure. This foundational task sets the stage for a sturdy and attractive fence that can withstand various environmental factors.
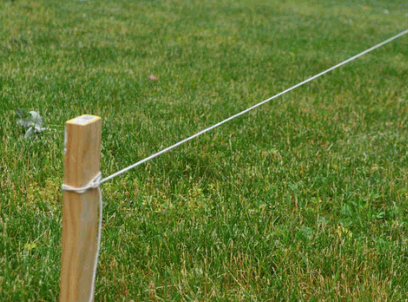
To effectively mark the placement, utilising stakes and string lines is highly recommended. Begin by establishing corner posts; drive stakes into the ground at each designated post location.
- Next, tie a string line tightly between the stakes. This string will serve as a visual guide to ensure that all posts are aligned properly.
- It is essential to maintain even spacing, which becomes increasingly important, especially on a slope. Accurate placement will not only enhance the aesthetic appeal but also contribute significantly to the fence’s structural integrity.
As you work, double-check the measurements to confirm that they are consistent and meet your desired spacing. This careful planning will aid in creating a stable and effective barrier that fulfills its purpose for years to come.
Dig The Holes For Your Fence Posts
Digging the holes for your fence posts is an essential phase that lays the groundwork for a sturdy and secure wooden fence, particularly on a sloped property.
Before embarking on this task, it is crucial to gather the right tools that will not only make the job easier but also ensure accuracy. A post-hole digger is one of the most important tools, specifically designed to excavate narrow holes deep enough to anchor your posts securely. Some might also consider using an auger for larger or tougher soil conditions, which can significantly reduce physical strain.
- Assessing Soil Conditions: Evaluating the type of soil where you will dig is vital. Sandy soils drain well but may require deeper holes to maintain stability, whereas clay soils can retain water, leading to potential rot.
- Depth and Width: Aim for a depth that is one-third the height of the fence post above ground. Typically, widths should be about three times the diameter of the post to allow for stabilisation.
It is beneficial to consider drainage issues; ensuring that water does not pool around the posts will help maintain their integrity over time. This proactive approach significantly enhances the longevity of any wooden fence, especially in varying weather conditions.

Set The Fence Posts In Concrete
Setting your fence posts in concrete is a critical step that ensures the long-term stability and durability of your wooden fence, especially in areas with sloped terrain.
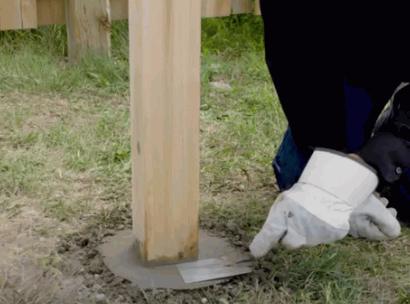
Taking the time to properly mix and pour the concrete around the posts will provide the necessary support they need against various environmental elements. Begin by using a concrete mix that is suitable for your specific climate, adhering to the manufacturer’s guidelines for water ratios and curing times. Once mixed thoroughly, pour the concrete into the hole, ensuring it surrounds the post completely.
Allowing adequate curing time is essential; typically, this can take anywhere from 24 to 48 hours. During this phase, regularly check for levelness and alignment of each post, using a carpenter’s level and making adjustments as necessary.
- Start by gently tapping the post to maintain its position.
- Recheck the level after pouring the mix, making small adjustments as needed.
- Continuous monitoring ensures that the posts remain vertically aligned and enhances the integrity of the overall fence installation.
Install The Fence Rails
Installing the fence rails is an important step that connects the posts and provides the necessary support for the rest of the fence structure, ensuring durability and stability while serving as a critical component in the overall framework of the fence.
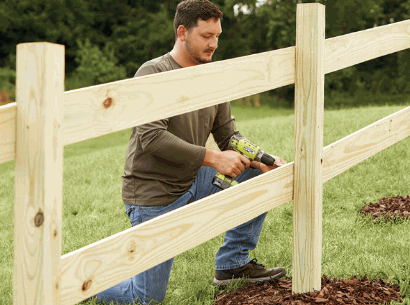
To successfully install the rails, first, check the slope of your garden as it dictates the angle at which the rails must be aligned. A precise alignment ensures that the entire fence will function well and look aesthetically pleasing. Here’s how to properly secure them:
- Measure the slope: Use a spirit level to determine the gradient of your garden, adjusting the height of the rails accordingly.
- Position the rails: Once measured, align the rails with the correct slope and position them between the posts.
- Secure the rails: Use quality fixtures to attach the rails firmly to the posts; this prevents them from shifting over time.
- Stability check: After installation, check the stability of the rails by applying slight pressure to ensure they can support the weight of the fence panels.
By paying close attention to these details, your fence will not only stand tall but will also withstand various environmental factors.
Attach The Fence Boards
Attaching the fence boards is the final step in constructing your wooden fence and is crucial for achieving the desired level of privacy and security for your sloping property.
Regarding attaching fence boards, the choice of method can significantly impact both appearance and functionality. Depending on the style of boards selected, options may include:
- Traditional Nailing: This method is straightforward and commonly used, ensuring each board is securely fastened to the rails.
- Screwing: For added strength and durability, screws can be utilised, making it easier to replace individual boards if needed.
- Hidden Fasteners: This modern approach enhances aesthetics by concealing the fasteners, providing a clean and sleek finish.
Regardless of the chosen method, maintaining uniform gaps between the boards is essential. These gaps not only allow for adequate drainage but also contribute to the overall visual appeal of the fence, ensuring it complements the landscape beautifully.
Add A Finishing Touch
Adding a finishing touch to your installed wooden fence not only enhances its visual appeal but also protects it from the elements and prolongs its lifespan.
To achieve these benefits, there are several effective treatment options available. For instance, staining a fence allows the wood’s natural grain to show through while adding a layer of protection against moisture. This choice not only boosts aesthetics but also promotes durability.
- Sealing is another excellent method, providing a clear barrier that shields the wood from water damage and UV rays.
- Alternatively, painting can give the fence a vibrant look, offering both colour and protection, but it may require more maintenance over time.
Regular upkeep is vital; by periodically checking for signs of wear and refreshing the chosen treatment every few years, one can ensure the fence remains attractive and sturdy.
Simple maintenance tips, such as cleaning debris and applying protective finishes, can help preserve the fence’s beauty for many years to come.
Tips And Tricks For Installing A Wood Fence On A Slope
Regarding installing a wooden fence on a slope, using specific tips and tricks can streamline the process and enhance the overall result, ensuring a sturdy and visually appealing structure.
Consider Using Pre-Made Fence Panels
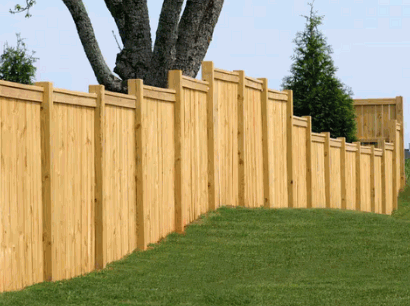
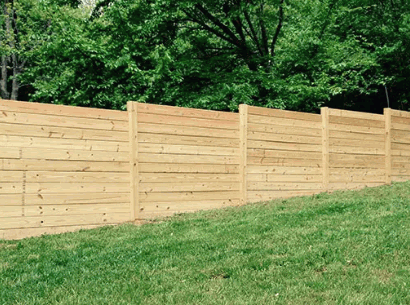
Using pre-made fence panels can significantly simplify the installation process, especially on a sloping garden, providing consistent heights and reducing the amount of cutting required. By choosing these panels, homeowners can enjoy the benefits of a uniform appearance that enhances the overall visual appeal of their property, eliminating the guesswork and complications that come with hand-built fencing solutions.
This not only ensures that the appearance remains cohesive but also results in substantial time savings, allowing the project to be completed much more quickly than traditional methods.
Here are some key advantages:
- Ease of Installation: Pre-made panels are designed for straightforward assembly, making it possible for even novice DIY enthusiasts to achieve a professional finish.
- Aesthetic Consistency: The uniformity of these panels ensures that your fence looks elegant and intentional, seamlessly blending with your landscaping.
- Time Savings: With pre-fabricated options, the hours spent on tedious measuring and cutting are drastically reduced.
These panels can be adapted to various slope levels, ensuring that homeowners can achieve complete enclosures without compromising security and privacy.
Use A String Line For A Straight Fence
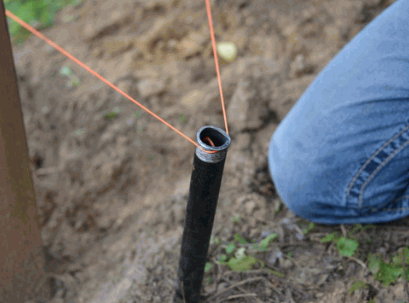
Utilising a string line is an effective method for ensuring that your fence remains straight and aligned, particularly crucial when working with the uneven ground of a sloped garden.
Setting up a string line can significantly simplify the process of fence installation. To begin, you should gather your materials, including stakes, a measuring tape, and of course, the string itself.
- First, drive stakes into the ground at either end of where the fence will be placed, ensuring they are firmly anchored.
- Next, measure the distance for your posts and attach the string to the stakes, pulling it taut to create a clear visual guide.
- Once the string line is in place, use its alignment to mark the spots for each fence post, ensuring that they are evenly spaced.
This method not only provides a straightforward visual aid but also helps in maintaining a professional appearance throughout your fencing project.
Use Adjustable Brackets For Uneven Terrain
Adjustable brackets can be a game-changer when installing a fence on uneven terrain, allowing for enhanced flexibility and adaptability in securing your fence structure.
This innovative solution not only addresses the challenges posed by varying slopes and heights but also instills a sense of confidence in the overall stability of the installation. With these brackets, users can effectively manage the installation process, ensuring that each post is securely anchored, regardless of the geographical intricacies.
- One of the key benefits is the precise positioning they offer, enabling adjustments that take into account shifts in elevation.
- They provide a robust framework that supports the weight of the fence, minimising the risk of leaning or shifting over time.
Consequently, using adjustable brackets results in a more reliable structure, ultimately saving time and money on repairs and maintenance in the long run.
Conclusion
In conclusion, installing a wooden fence on a sloped property requires careful planning, the right tools, and materials to overcome various challenges while ensuring safety and aesthetic appeal.
When undertaking this significant project, it is essential to assess the slope of your land accurately, as this will directly influence the overall design and structural integrity of the fence. By fully engaging in the preliminary steps, property owners can avoid common pitfalls and achieve a successful outcome that reflects their unique style and needs.
- Proper techniques enhance installation stability.
- Choosing high-quality materials prevents long-term wear.
- Incorporating correct measurements ensures uniformity throughout the fence.
A well-constructed fence not only provides security for your property but also boosts privacy and transforms your outdoor space into a more enjoyable retreat. Following these outlined steps and tips significantly increases the likelihood of installing a durable, attractive fence that complements the property’s existing landscape.